Teacher view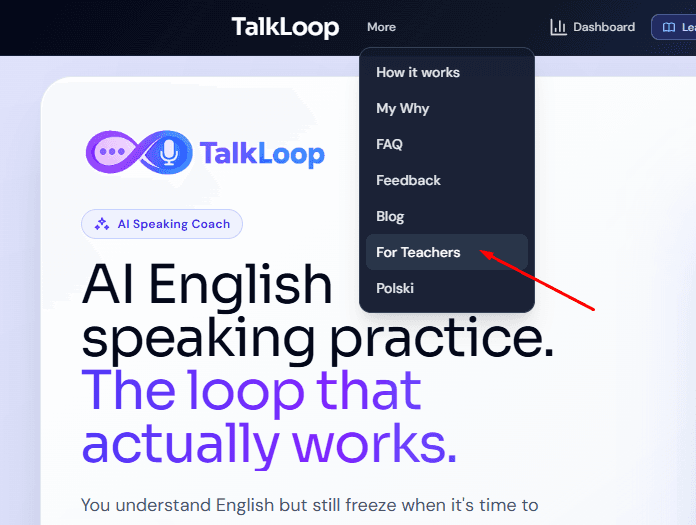
Screen 1
Teacher viewOpen the teacher area from the main app
From the main TalkLoop navigation, the teacher starts by choosing 'For Teachers'. This moves the flow from the learner-facing app into the teacher workspace.
This is the actual TalkLoop workflow, based on the product screens. Set up your teacher profile, invite students with one link, define each learner's private scope, assign tasks, and review the results in one place.
Teacher side
Profile, invite links, private student scope, manual tasks, AI tasks, and a dashboard with errors, scores, and trends.
Student side
The student accepts a link, sees who they are learning with, receives tasks from the teacher, completes them, and keeps practicing inside the app.
This version follows the actual screens in the product. It shows what the teacher does first, what the student sees next, and how the follow-up loop becomes practical after onboarding.
Practical flow
The entry is short: move from the main app into the teacher area and set up your profile right away.
Screen 1
Teacher viewFrom the main TalkLoop navigation, the teacher starts by choosing 'For Teachers'. This moves the flow from the learner-facing app into the teacher workspace.
Screen 2
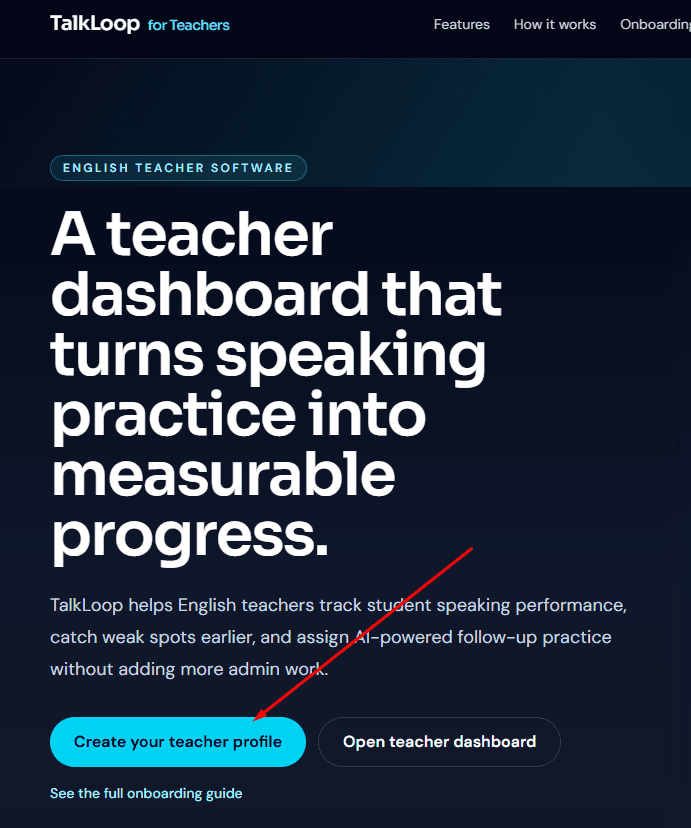
Teacher viewThe teacher landing leads directly into account setup. The goal is simple: move from the public page into the teacher panel with as little friction as possible.
Screen 3
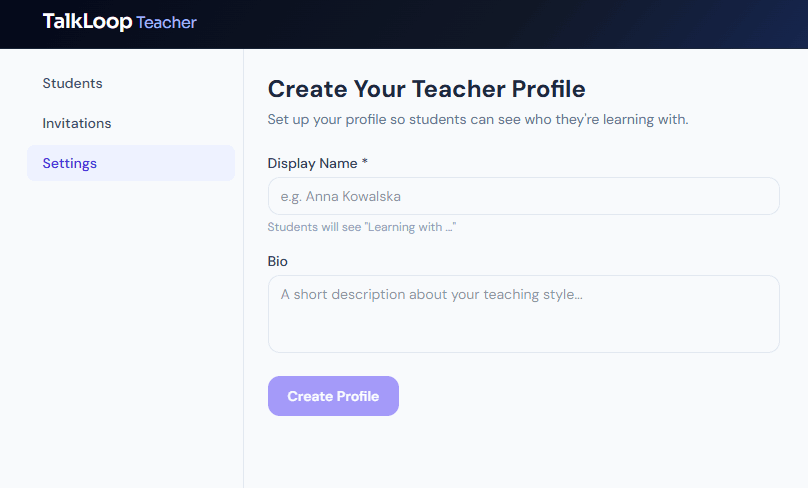
Teacher viewThe teacher adds a display name and, optionally, a short bio. That name becomes the visible teacher identity students will recognize in the app.
Practical flow
Next comes the teacher-student connection itself. The link should be simple, and the result should be visible immediately.
Screen 4
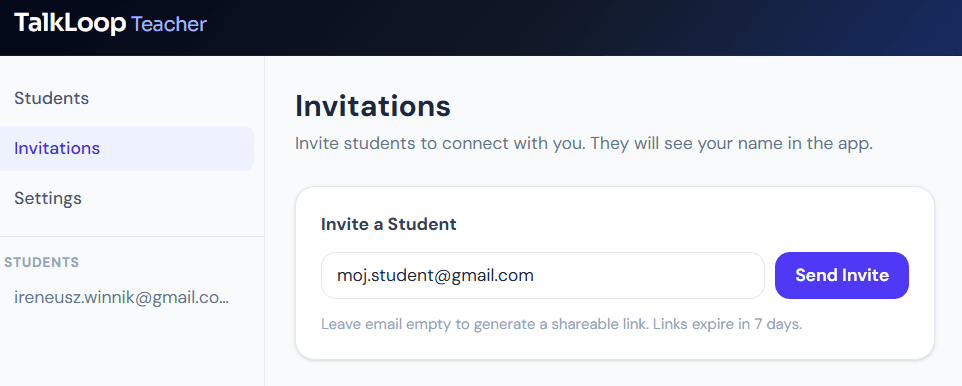
Teacher viewAfter setup, the teacher can invite students from the Students view. Once invited, students are assigned to that teacher and will see that connection inside the app after they sign in.
Screen 5
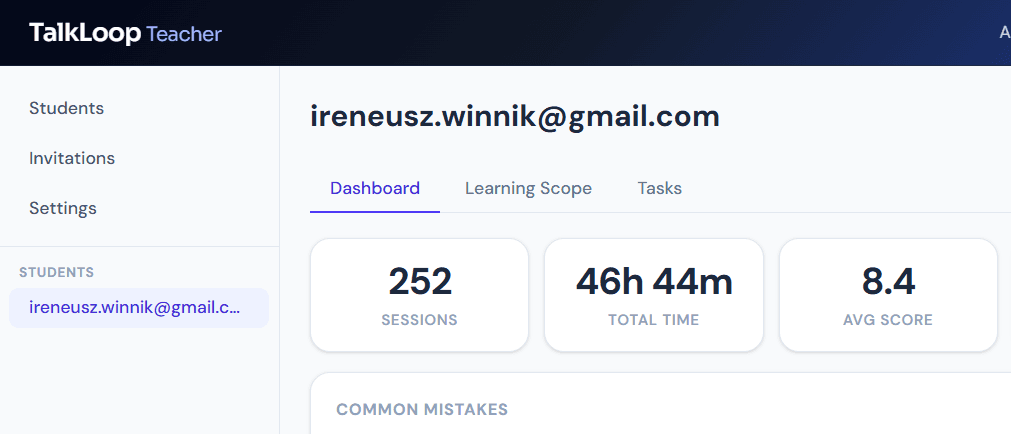
Teacher viewOnce the invite is accepted, the student is visible in the teacher panel and can be opened from the sidebar. From there, you can review progress, scope, and tasks in one place.
Practical flow
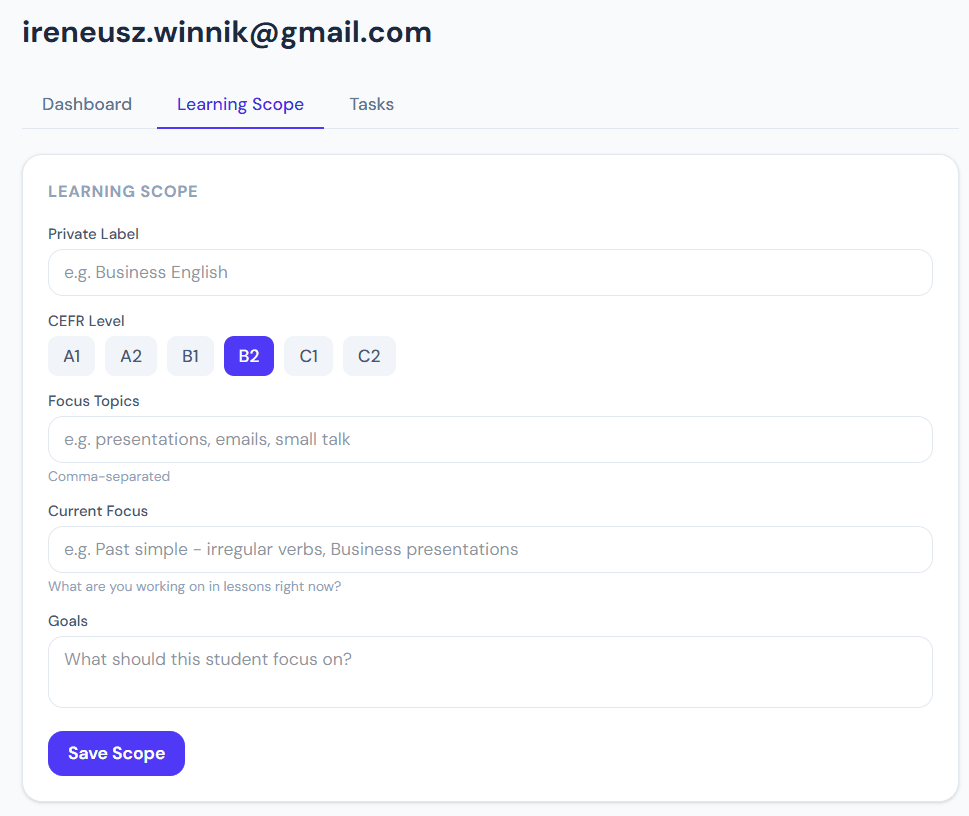
This is where the system becomes personal: you set the level, topics, and actual focus for this learner.
Screen 6
Teacher viewThe teacher defines CEFR level, topics, current focus, and goals. This is where the workflow becomes personal: one student may need stronger writing, another may need more confidence in meetings.
Practical flow
The student gets clear assigned work, while you can sharpen the context and generate a more useful task set.
Screen 7
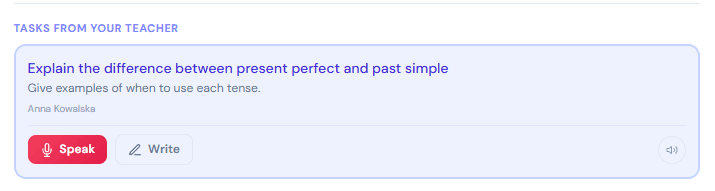
Student viewOnce tasks are assigned, the student sees them inside the app right away. The view stays simple: the task is visible, the instruction is clear, and the teacher context is preserved.
Screen 8
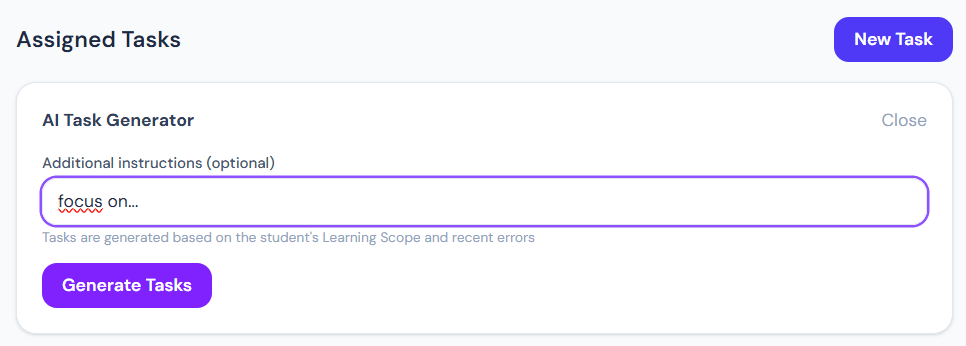
Teacher viewThe teacher can add extra instructions on top of the saved student scope and recent mistakes. This lets you guide the next task set toward a specific lesson goal, topic, or correction target.
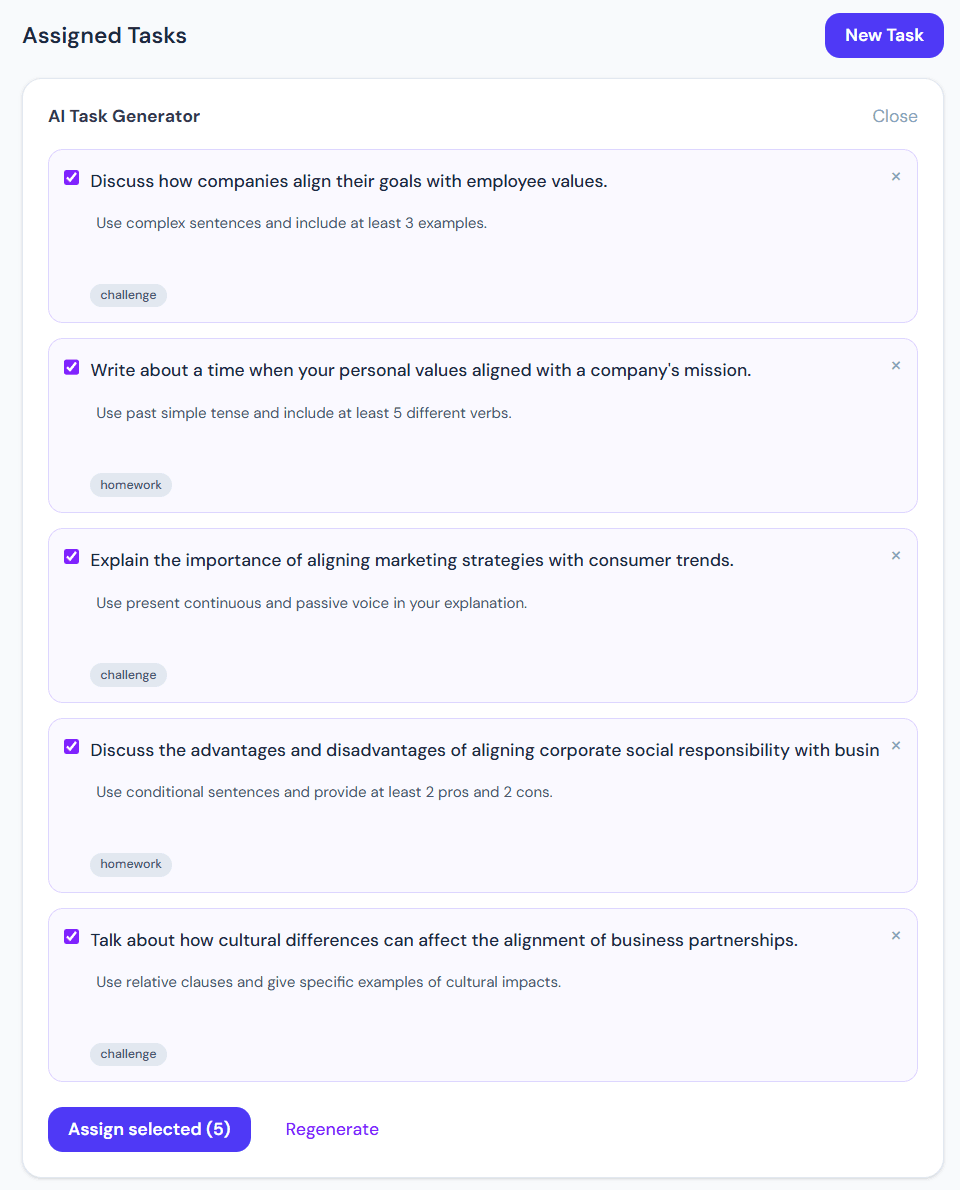
Screen 9
Teacher viewYou can regenerate the set, review the proposed tasks, and assign one, several, or all of them. The teacher keeps control over task selection, level, and relevance.
Practical flow
At the end, the student gets immediate correction, and you no longer have to guess what worked and what needs improvement.
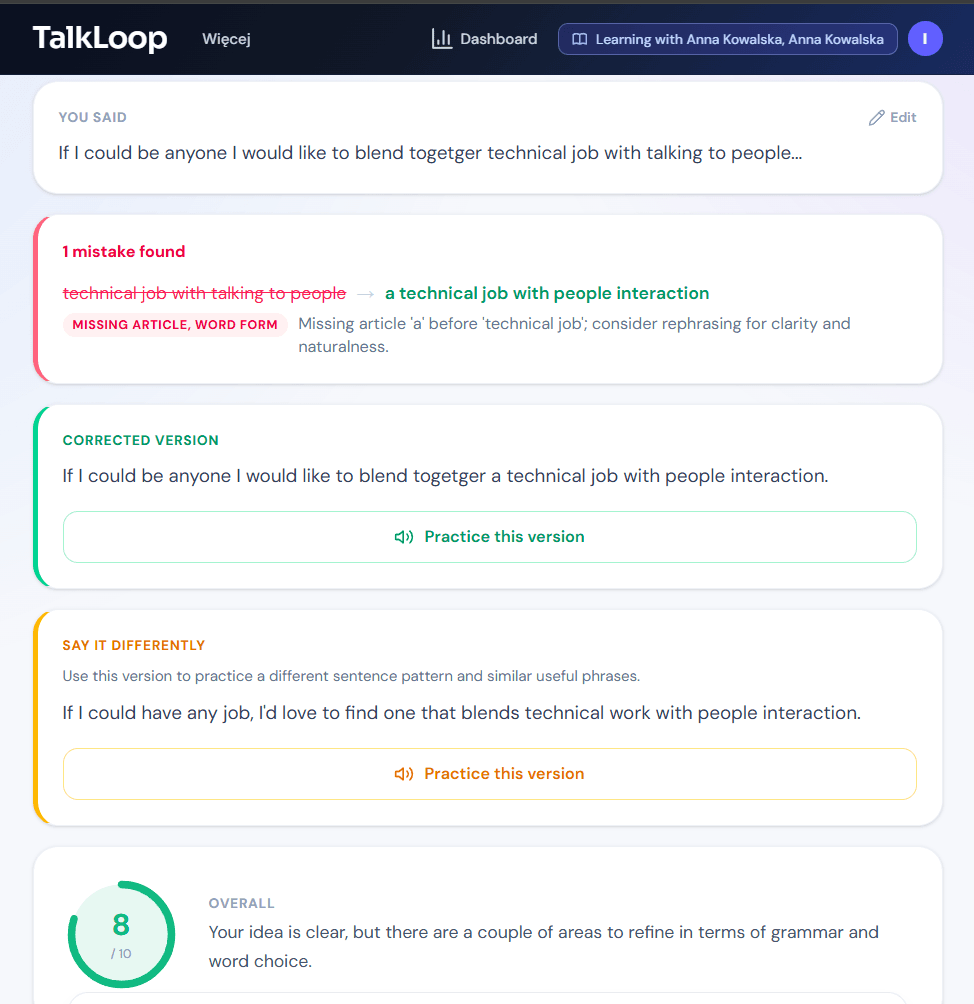
Screen 10
Student viewAfter completing the task, the student gets immediate corrections, better phrasing, and a score. The exact style of analysis can match the kind of practice you want the student to focus on.
The teacher setup is intentionally short. The goal is to get from account creation to useful student data without extra admin friction.
Open teacher settings, set the name students should see, and add a short bio. This is the teacher identity students recognize on invites and inside the app.
Students see a badge that says 'Learning with {your name}'. That comes directly from your teacher profile, so it should be a real name or teaching brand, not a placeholder.
In the invitations view, you can generate a shareable invite link or create an invite tied to an email. The link can be copied and sent directly to the student.
Once the invite is accepted, the student is connected to your account and becomes visible in your student list. From there, you can open their dashboard, scope, and tasks.
Each student has a dedicated area where you can review speaking data, save their private learning scope, create tasks manually, or assign AI-generated follow-up.
The student flow stays simple. The product removes setup complexity so students can join fast and start practicing right away.
Step 1
Every invite leads to a dedicated accept page. If the student is not signed in yet, they are prompted to sign in first and then return to the invite.
Step 2
After acceptance, the student is linked to your teacher account. The confirmation screen shows who they are now learning with, so the relationship is explicit.
Step 3
Pending tasks appear in the student dashboard with your name. When the student works on a task, the app keeps the teacher assignment in context.
This matters operationally: students should know who their teacher is, but your internal planning notes should stay on the teacher side.
The onboarding matters because it unlocks a tight feedback loop. Once the student is connected, the teacher workflow becomes much more useful than generic homework.
Set CEFR level, topics, goals, and current focus so the system understands what matters for this learner and what kinds of mistakes deserve more attention.
You can create tasks yourself, assign challenge tasks, or generate task ideas with AI based on the student's saved scope and recent speaking errors.
When the student completes a task, you can review the spoken text, corrected version, detected errors, AI feedback, completion status, and score inside the teacher panel.
The fastest useful setup is simple: create your profile, send one invite link, set the student's private scope, and assign the first task. From there, the dashboard starts becoming genuinely useful.